#304 USB Serial Brick

Overview
FT232RLを使用した、USBシリアル通信ができるBrickです。
Connecting
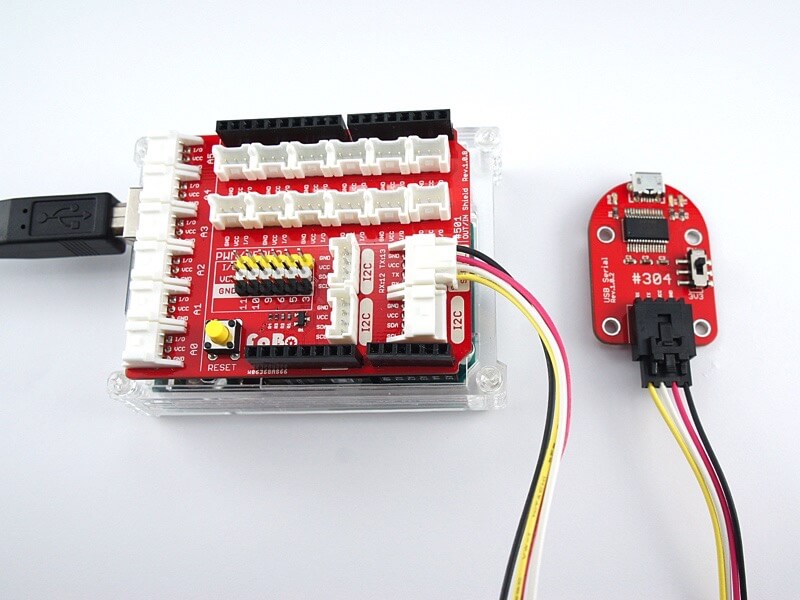
Serialコネクタへ接続し、MicroUSBコネクタを他のデバイスに接続します。

Support
| Arduino | RaspberryPI | IchigoJam | NRF51 |
|---|---|---|---|
| ◯ | ◯ | ◯ | ◯ |
FT232RL Datasheet
| Document |
|---|
| FT232RL Datasheet |
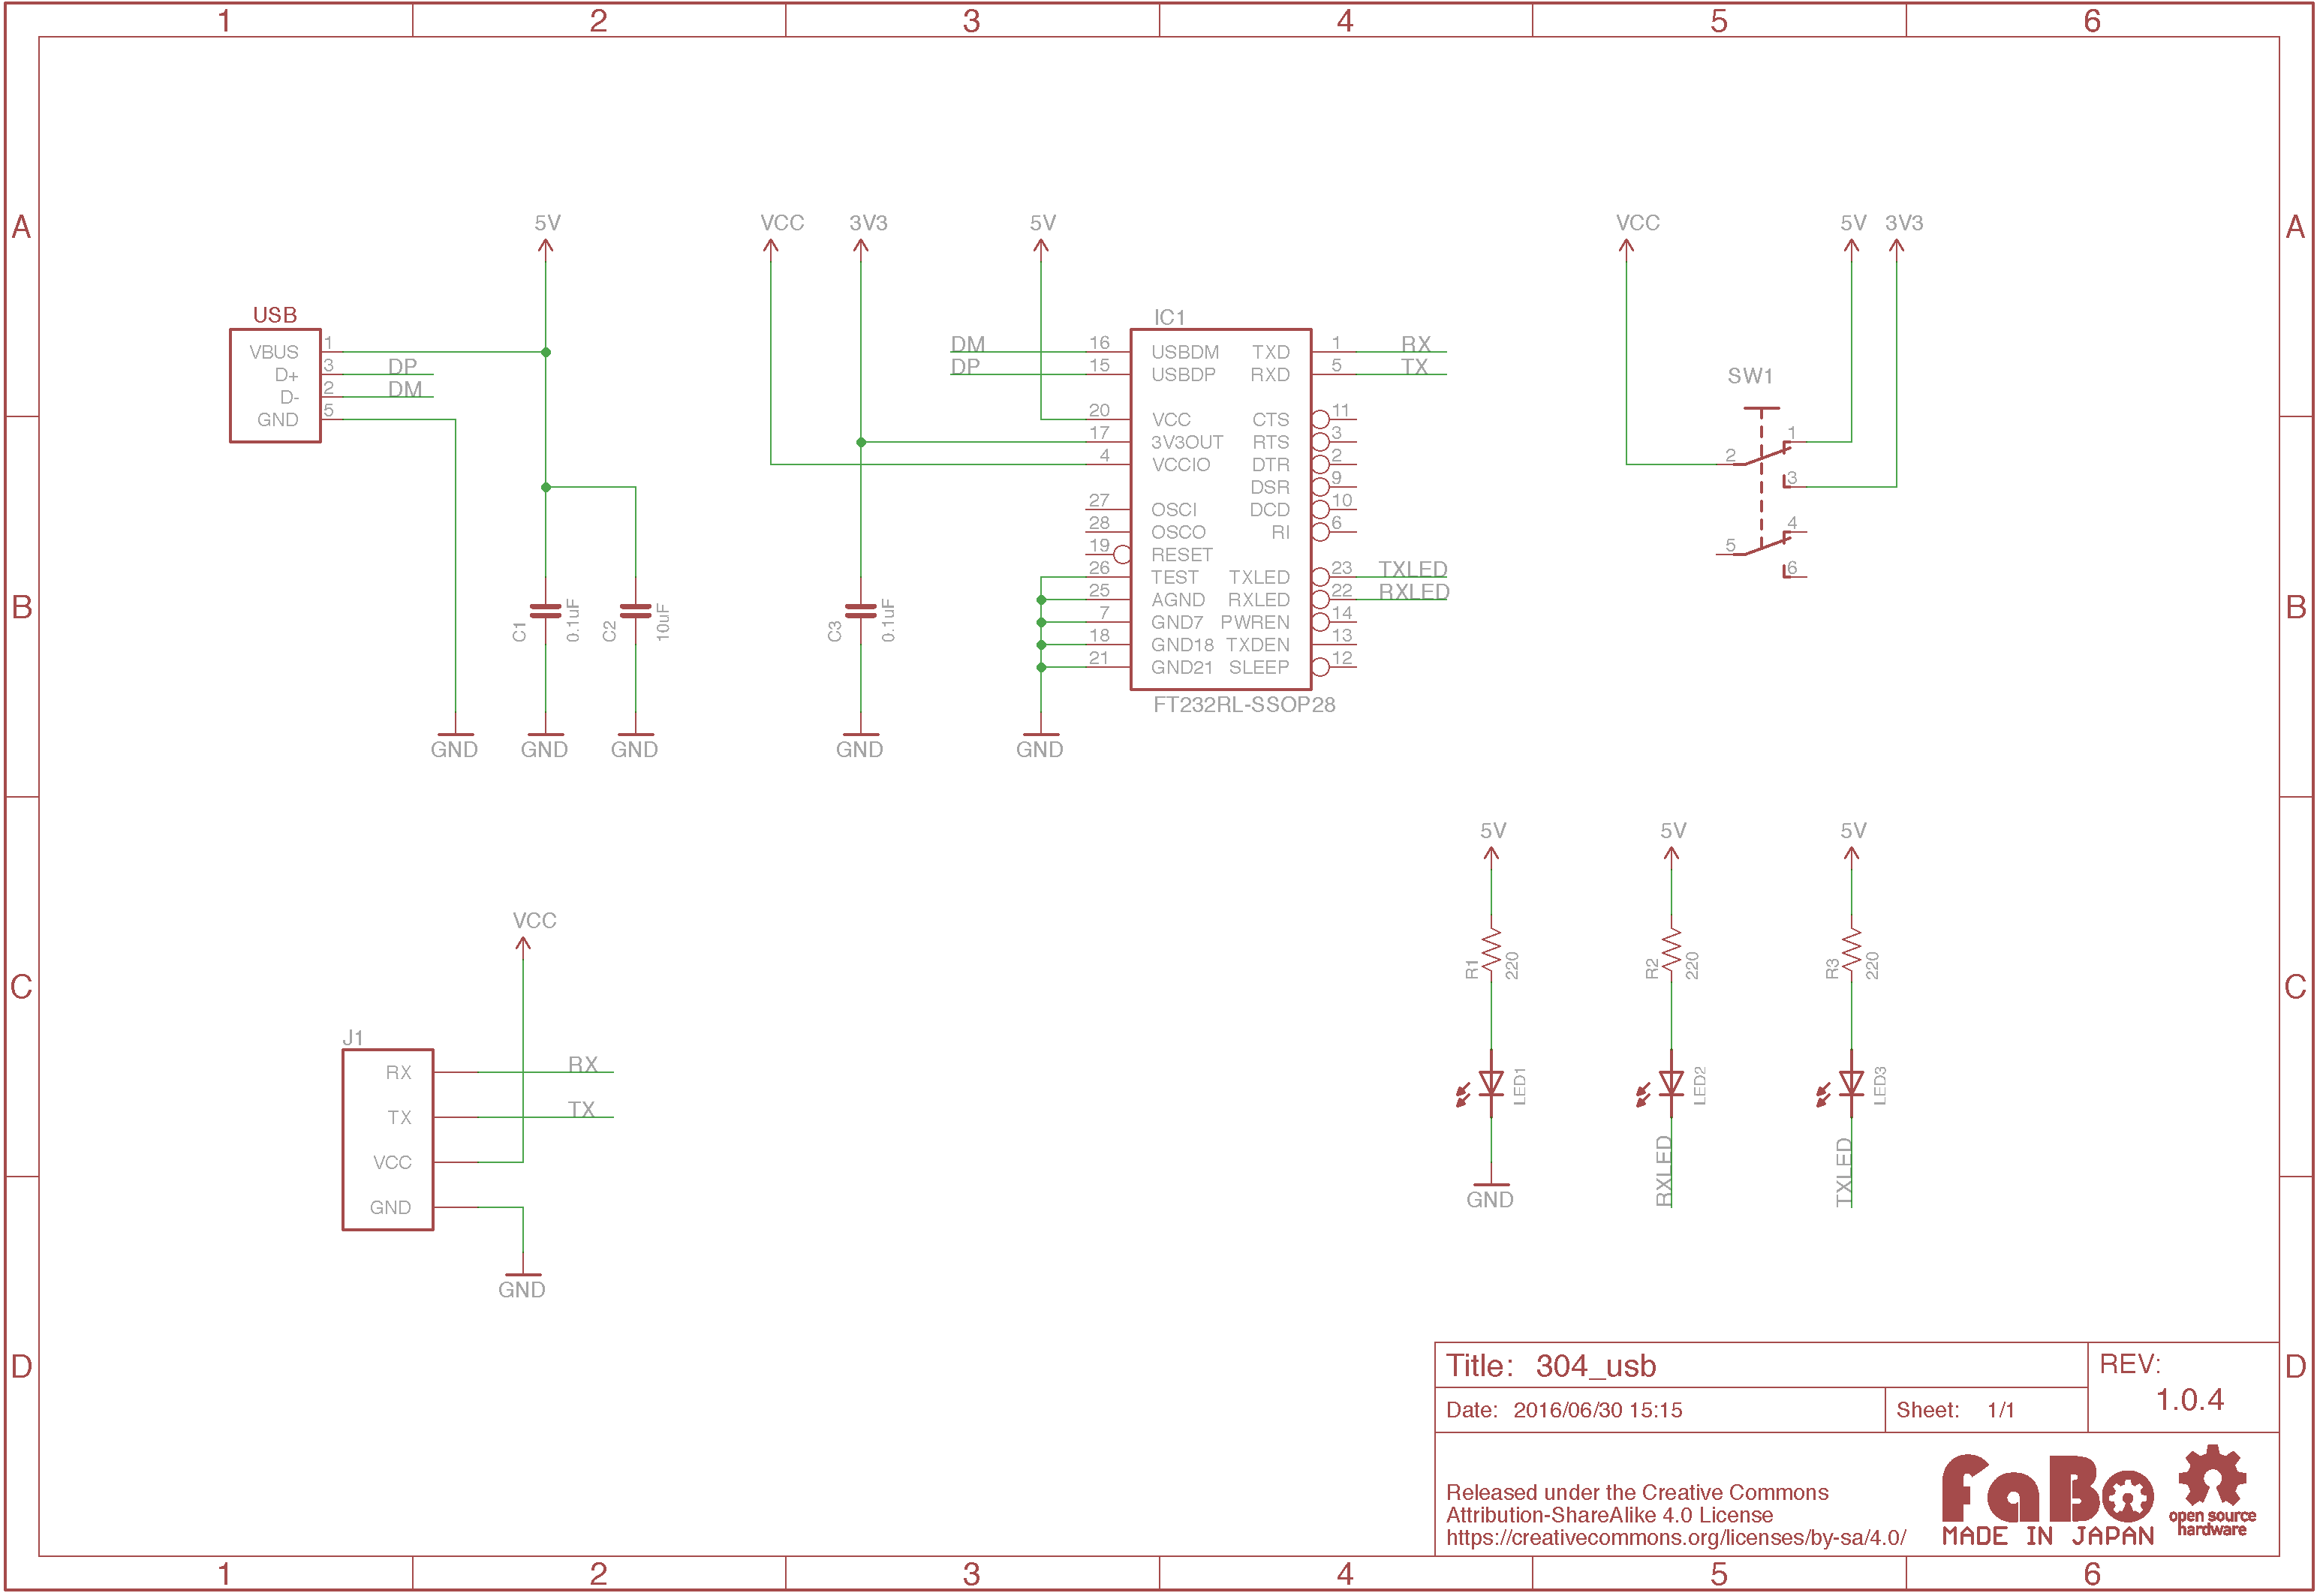
Schematic

Sample Code
for Arduino
//
// FaBo Brick Sample
//
// brick_serial_usb
//
#include <SoftwareSerial.h>

int serialusbRx = 12;  // RX-I pin  Arduino D10
int serialusbTx = 13;  // TX-O pin  Arduino D11

SoftwareSerial mySerial(serialusbRx, serialusbTx); // RX, TX

void setup()
{
  // Open serial communications and wait for port to open:
  Serial.begin(9600);
  while (!Serial) {
    ; // wait for serial port to connect. Needed for Leonardo only
  }

  Serial.println("Goodnight moon!");

  // set the data rate for the SoftwareSerial port
  mySerial.begin(9600);
}

void loop() // run over and over
{
  if (mySerial.available()){
    char c = mySerial.read();
    Serial.println(c);
  }
  if (Serial.available())
    mySerial.write(Serial.read());
}
for RaspberryPI
# coding: utf-8
#
# FaBo Brick Sample
#
# brick_serial_usb
#

import serial
import time

BLUETOOTH = '/dev/ttyAMA0'
RATE = 115200

if __name__ == '__main__':

    count = 0
    myserial=serial.Serial(BLUETOOTH, RATE, timeout=1)

    while True:
        count += 1
        myserial.write("send:%d" %count)
        str=myserial.readline()
        print (str)
MACでのシリアル通信確認
Arduino(またはRaspberryPI)にBrickを接続した状態でPCと接続
ターミナルを起動し、下記のコマンドを実行して接続先の確認
※「/dev/tty.usbserial」で始まるものがBrickになります。sudo ls /dev/tty.*
** ターミナルにて下記のコマンドを実行し、Screenを起動
※「XXXXX」の箇所は上記で確認したものを設定します。
sudo screen /dev/tty.XXXXX 115200
Arduinoを起動し、シリアルモニタを開く
シリアルモニタより文字を入力してEnterキーを押下、またはScreenの画面からキーを入力により文字が送信できることを確認
終了する場合、[Ctrl+A]->[Ctrl+¥]->[Y]の順にキーを押す
NRF51
#include "nrf.h"
#include <stdbool.h>
#include <stdint.h>
#include <stdio.h>
#include "app_uart.h"
#include "app_error.h"
#include "nrf_delay.h"

#define UART_TX_BUF_SIZE 256 /**< UART TX buffer size. */
#define UART_RX_BUF_SIZE 1   /**< UART RX buffer size. */
#define NRF_APP_PRIORITY_HIGH 1

#define FABO_RX 9
#define FABO_TX 11
#define FABO_RTS 0
#define FABO_CTS 0

/**
 * @brief UART events handler.
 */
void uart_events_handler(app_uart_evt_t * p_event)
{
    switch (p_event->evt_type)
    {
        case APP_UART_COMMUNICATION_ERROR: APP_ERROR_HANDLER(p_event->data.error_communication);
            break;

        case APP_UART_FIFO_ERROR:          APP_ERROR_HANDLER(p_event->data.error_code);
            break;

        case APP_UART_TX_EMPTY:
            break;

        default: break;
    }
}

/**
 * @brief UART initialization.
 */
void uart_config(void)
{
    uint32_t                     err_code;
    const app_uart_comm_params_t comm_params =
    {
        FABO_RX,
        FABO_TX,
        FABO_RTS,
        FABO_CTS,
        APP_UART_FLOW_CONTROL_DISABLED,
        false,
        UART_BAUDRATE_BAUDRATE_Baud38400
    };

    APP_UART_FIFO_INIT(&comm_params,
                       UART_RX_BUF_SIZE,
                       UART_TX_BUF_SIZE,
                       uart_events_handler,
                       APP_IRQ_PRIORITY_LOW,
                       err_code);

    APP_ERROR_CHECK(err_code);
}

/**
 * @brief Function for main application entry.
 */
int main(void)
{
    uart_config();

    printf("\n\rHello Serial.\r\n");

    while (true)
    {
    }
}
NRF52
FaBoのSerialのRX, TXは、NRF52 DKのP0.22,P0.23を参照します。
#include <stdbool.h>
#include <stdint.h>
#include <stdio.h>
#include "app_uart.h"
#include "app_error.h"
#include <string.h>

#define UART_TX_BUF_SIZE 256 /**< UART TX buffer size. */
#define UART_RX_BUF_SIZE 1   /**< UART RX buffer size. */

#define FABO_RX  22
#define FABO_TX 23
#define FABO_CTS 0 // not use
#define FABO_RTS 0 // not use

#ifndef NRF_APP_PRIORITY_HIGH
#define NRF_APP_PRIORITY_HIGH 1
#endif

#define SAMPLES_IN_BUFFER 5

/**
 * @brief UART events handler.
 */
void uart_events_handler(app_uart_evt_t * p_event)
{
}

/**
 * @brief UART initialization.
 */
void uart_config(void)
{
    uint32_t                     err_code;
    const app_uart_comm_params_t comm_params =
    {
        FABO_RX,
        FABO_TX,
        FABO_RTS,
        FABO_CTS,
        APP_UART_FLOW_CONTROL_DISABLED,
        false,
        UART_BAUDRATE_BAUDRATE_Baud38400
    };

    APP_UART_FIFO_INIT(&comm_params,
                       UART_RX_BUF_SIZE,
                       UART_TX_BUF_SIZE,
                       uart_events_handler,
                       APP_IRQ_PRIORITY_LOW,
                       err_code);

    APP_ERROR_CHECK(err_code);
}

/**
 * @brief Function for main application entry.
 */
int main(void)
{
    uart_config();

    printf("\n\rHello Serial.\r\n");

    while(true)
    {
    }
}
Parts
- USB UART IC